With the launch of Office 365 and its new advanced features, many users switched to Microsoft 365. There are various users that have OST file and want to import them into their Office 365 mailbox. Here in this post, we will discuss the secure and efficient way to import OST to Office 365 account with complete data.
Since we already know that OST file contains a copy of your Outlook data in offline mode. However, Office 365 doesn’t have any option to import OST file. However, there is a manual approach to complete the importing. Here in this post, we will discuss both manual and automated ways to import emails from OST file to Microsoft 365 account.
There are various users who want to migrate their OST file data into Outlook 365 mailbox, let’s have a look –

Here we get to know that user searching for a way to import their data. However, the question arises, what is the situation that leads to this import process?
When Need For OST to Office 365 Import?
Most users prefer a web-based email service over a desktop-based application. Although email clients have their perks. Now know why one needs to opt for Office 365.
1. If you are using O 365, it is easy to access all emails from any cloud-connected system.
2. OST files can easily get corrupted or damaged, so it is better to move them to a secure environment i.e. Office 365.
3. As O 365 saves its data on cloud servers, there is less risk of viruses, hacks and other malicious attacks.
Methods to Upload OST to Office 365
In this blog, we will discuss two different solutions to open OST files into Office 365 account. Let’s know what are they.
- Import Multiple OST to Office 365 Automatically
- Manually Import OST to Office 365
Know how these solutions solve your issue and move .ost file to Office 365 account.
How Import OST to Outlook 365 Using Professional Tool?
If you have an OST file and want to import it into an O 365 account in a few simple steps, then use the OST Converter tool. It is a direct way to import OST to Office 365 account without any data loss. This tool is enough to move multiple .ost files into Microsoft 365 account. Most importantly, while importing offline table data to a webmail account, this utility doesn’t compromise the data integrity.
Along with that, you can also import selective emails from OST files into your Office 365 account. It also offers multiple filters such as – to, from, subject, cc, bcc, date range, time, etc. Applying these filters users can search emails from the mailbox data files.

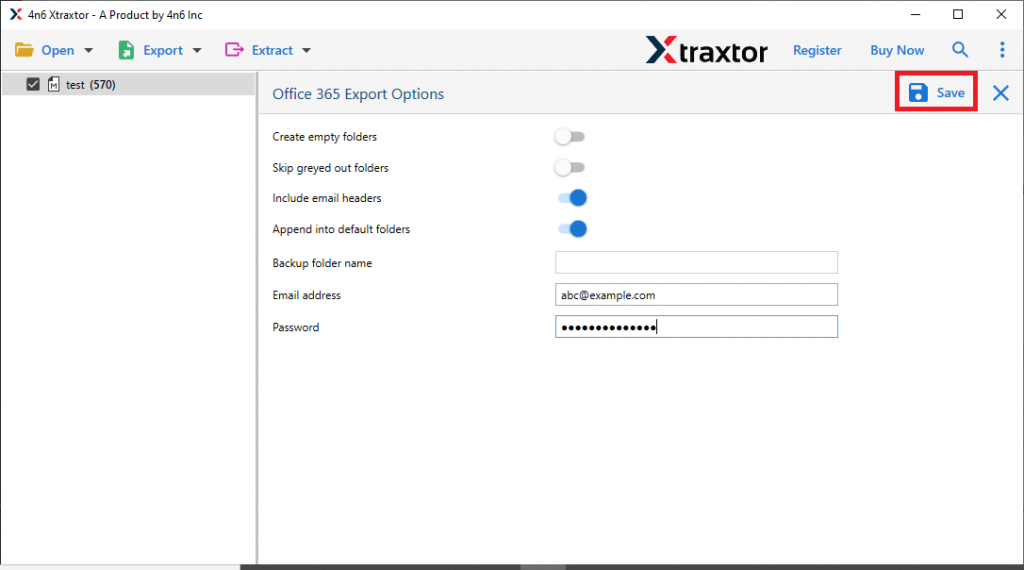
Steps to Import OST to Office 365
- Install and run SysConverter for OST software in your Windows OS system.
- After that click on the Open button and choose from the given option.
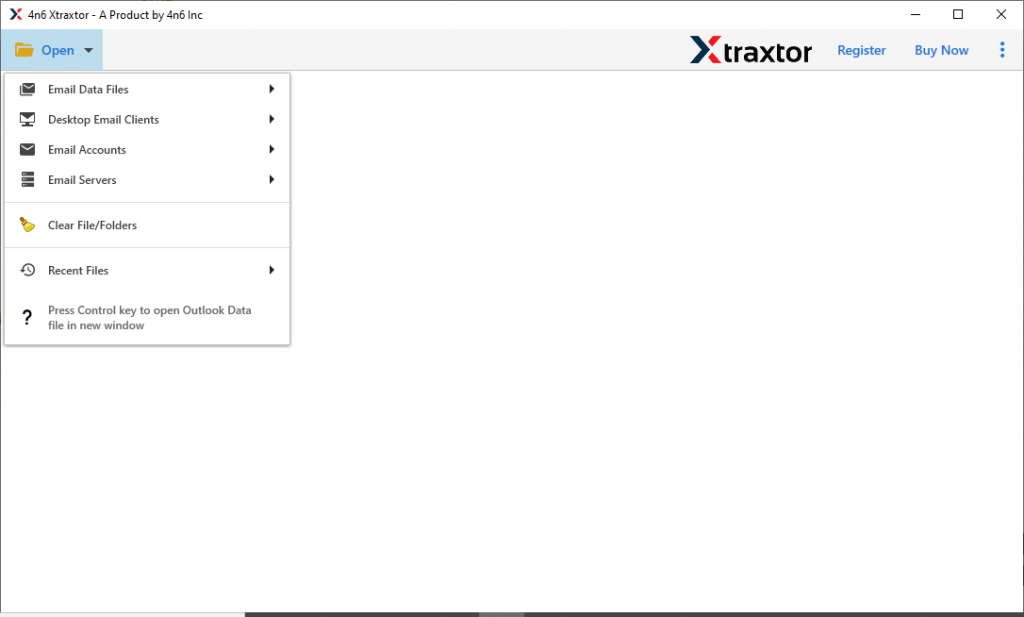
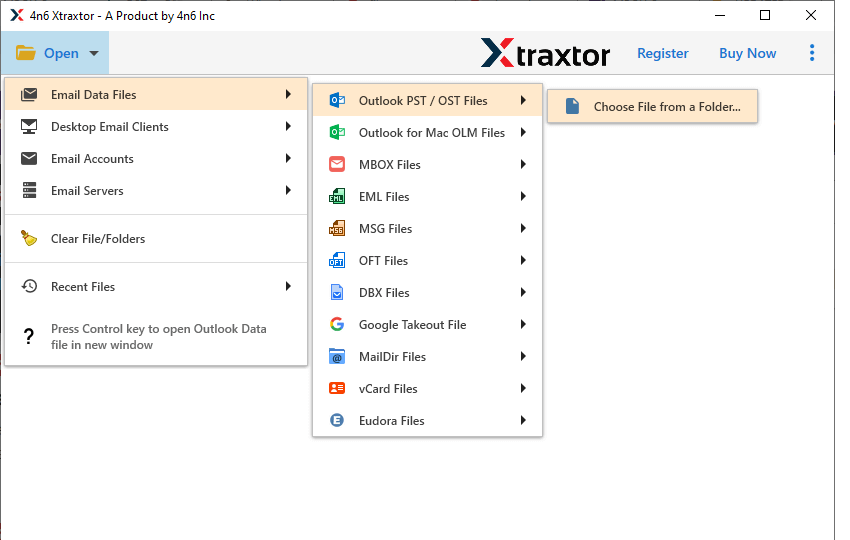
- Here select Email Data File >> OST File >> Select File or Folder.
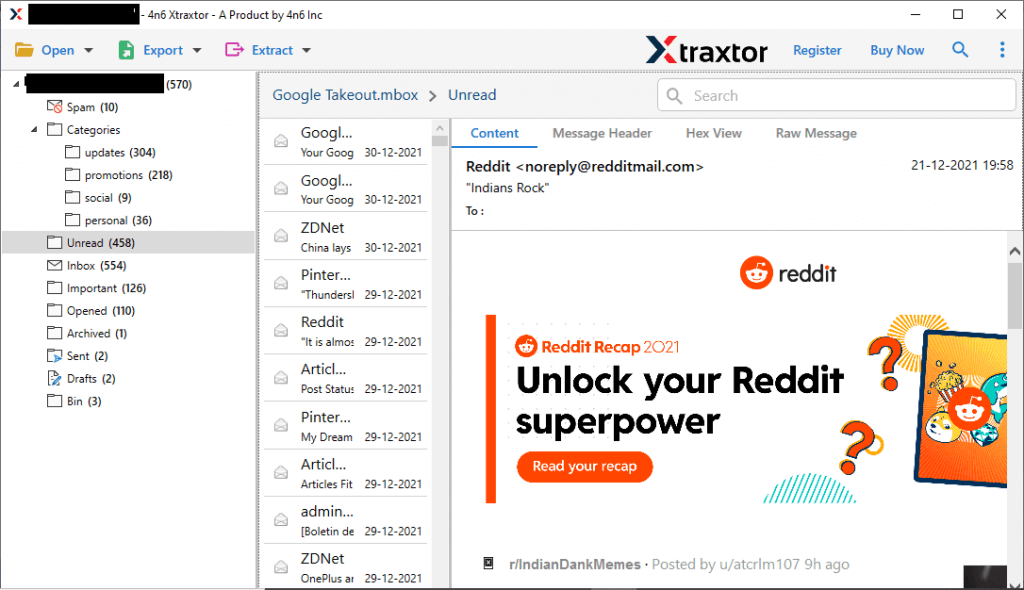
- Now you can view all OST file emails. Select the folder that is important and needs to import.
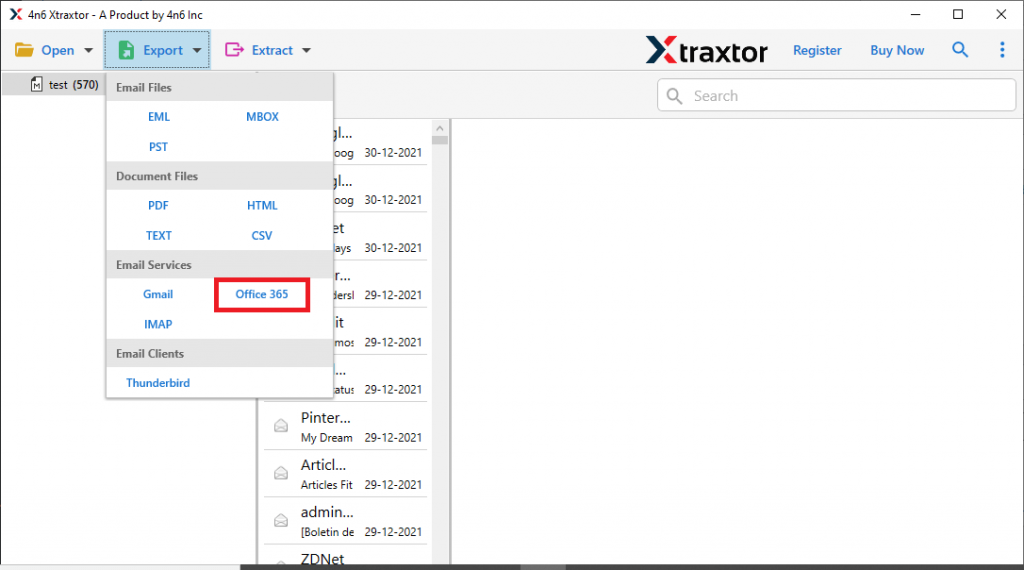
- Click on the Export and opt for Office 365 option from the given list.
- At last, enter your Office 365 login details and hit on the Save button.
Here you move multiple OST files into Outlook 365 account in simple six steps. Although this automated tool can open unlimited OST files in Office 365 account without facing any glitches, you can still use the manual way to perform this import process.
How to Open OST File in Office 365 Manually?
This manual process needs to be performed in two stages. First, you need to transform OST file data into PST and after that, you can move the .pst file into the Outlook 365 interface. In this way, you can import OST to Office 365 account.
Step 1: Save OST File Data Into PST Format
To open OST file data into O365 account, the user needs to convert OST to PST file format. As Office 365 supports .pst format. If you are connected to an Exchange server, then you can easily export mailbox data into an Outlook data file using the Import/Export tool. After that follows the instructions mentioned in the next section.
Step 2: Move PST to Office 365 Manually
After you get the .pst file, you need to import PST to Office 365 account by following the given instructions.
- Open your Outlook interface and select File >> Account Setting.
- In the account setting window, click on the New button.
- Choose Manual Setup >> Office 365.
- Enter Office 365 login details and click on Next then b.
- Restart Outlook and move to File >> Open & Export >> Import/Export.
- Import from another program or file >> Outlook data file (.pst).
- Browse PST file from the system and clcik on the Finish button.
- Move PST file emails under the Office 365 email address label by drag or drop method or copy the file and paste them.
In this way, you can open the OST file in Office 365 account. However, this method doesn’t ensure maintaining data integrity and avoiding data loss.
We still recommend using the automation tool for unlimited OST to Office 365 import process. The software is capable enough to open your .ost file data into your Outlook 365 account without any data loss and alteration.
Conclusion
This article describes two different ways to import OST to Office 365 webmail account. We mention manual as well as automated tool. If you have limited data in the .ost file, you can use the native method. However, if the size of the OST file is large and there are multiple data files, we suggest you use the import tool mentioned here in this blog.
Frequently Asked Questions
1. Can I import an OST file to Office 365 if I am not connected to the Exchange Server?
Ans. Yes, you can import the OST file into Office 365 account using this tool. You don’t need to connect with your Exchange Server.
2. Is there any size limitations when importing PST files to Office 365?
Ans. No, you can import large-size OST file to O 365 account without facing any difficulties.