Do you want to migrate Windows Live Mail to Office 365 account? In this post, we will discuss the exact way to transfer Windows Live Mail to Office 365 account without any hassle. Start reading the blog and export emails from Windows Live Mail to Outlook 365 mailbox without any hassle.
Before we move ahead let’s know why there is a need for the migration.
Why Need to Transfer Windows Live Mail to Outlook 365?
Migrating emails from Windows Live Mail to Office 365 can be necessary depending on user needs. Some common reasons are –
- System Upgrade: WLM is a discontinued email client that is not actively supported by Microsoft. Thus if you are upgrading your system then you can opt for webmail services. Therefore many users opt to transfer Windows Live Mail to Office 365 account.
- Office 365 Integrated Suite: Office 365 offers various other services that include – Word, Excel, PowerPoint, OneDrive and many more.
- Cloud Access: With Office 365 you can access your emails from any system that is connected to the internet. Enter your login details and read your emails without any hassle.
- Auto Synchronization: Any changes made on any device will reflect across the system. That means all your data will be up-to-date.
- Migration of Data: After you migrate Windows Live Mail to Outlook 365, you can easily move your data to another webmail platform without any hassle.
- Better Security: Outlook 365 offers robust security features that include – threat protection. encryption and multi-factor authentication.
How to Transfer Windows Live Mail to Office 365 Manually?
To migrate Windows Live Mail to Office 365 account manually, follow the given instructions –
Step 1. Export Windows Live Mail Data
- Open your Windows Live Mail application.
- After that, click on File >> Export and choose Email Messages.
- There select Microsoft Exchange and click on the Next button.
- Choose the email folders you want to transfer.
- Select the location to save the exported data file. (Create a new folder for this purpose)
- Then click on Next and then click on the Finish button.
Now you have all your Windows Live Mail data in a .pst file.
Step 2: Import Data into Office 365
- Log in to your Office 365 account and open Outlook on the web.
- Open your settings options and click on View all Outlook settings.
- In the settings panel, click on General and then Privacy & Security.
- Under Connected accounts, select Add a Connected account option.
- Enter your Windows Live Mail id and password and complete the setting.
- Once you are connected, Outlook will start import your emails.
- Check your Office 365 mailbox account and find the migrated WLM emails.
Done! Here you transfer Windows Live Mail to Office 365 account manually. However, this native approach is not a secure way to migrate Windows Live Mail to Outlook 365 account. To avoid any restrictions while export email from Windows Live Mail to Outlook 365, try the automated tool.
How to Migrate Windows Live Mail to Office 365 Instantly?
The Email Converter tool designed and developed by SysConverter is the best way to transfer Windows Live Mail to Outlook 365 mailbox. There are various advanced filter options – to, from, cc, bcc, name, date, time, has attachments and many others. Using this tool you can also transfer Windows Live Mail to Gmail, Yahoo, Yandex and many other webmail accounts.
Along with that, there are various other prominent features – maintaining data integrity, preserving email hierarchy, direct migration, auto-detect WLM profile from your system and many more. It also export Windows Live Mail to Gmail, Yahoo Mail and all other webmail accounts. You can also use the demo version of the software and know the proper working of the software.

Steps to Transfer Windows Live Mail to Office 365 Account –
Follow the given instructions and export email from Windows Live Mail to Outlook 365 –
- Launch the software on your system.
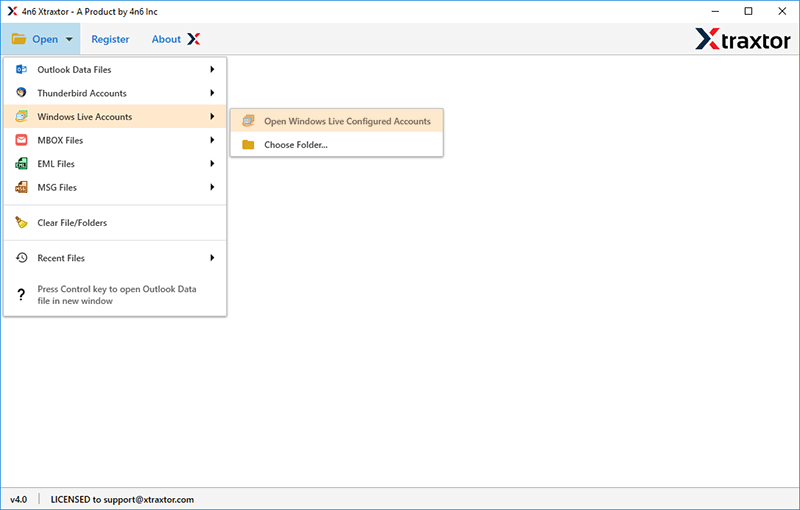
- Then, select Open >> Desktop Email Account >> Windows Live Mail >> Select Option.
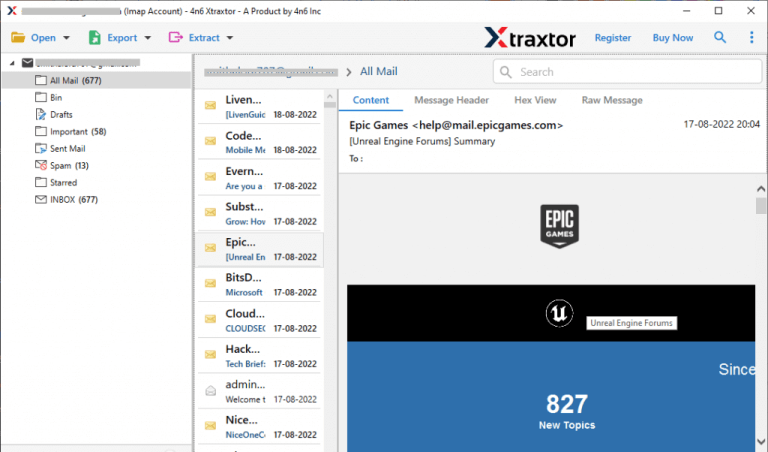
- Here you can view your emails before migrating them.
- Click on Export and choose Office 365 option.
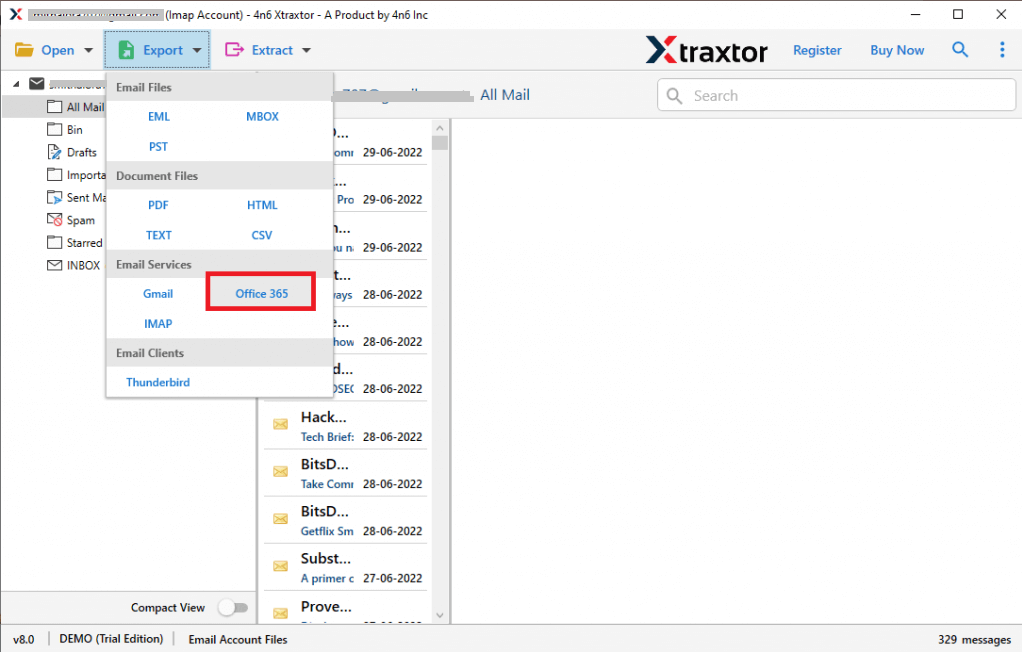
- Select the email folders you want to transfer.
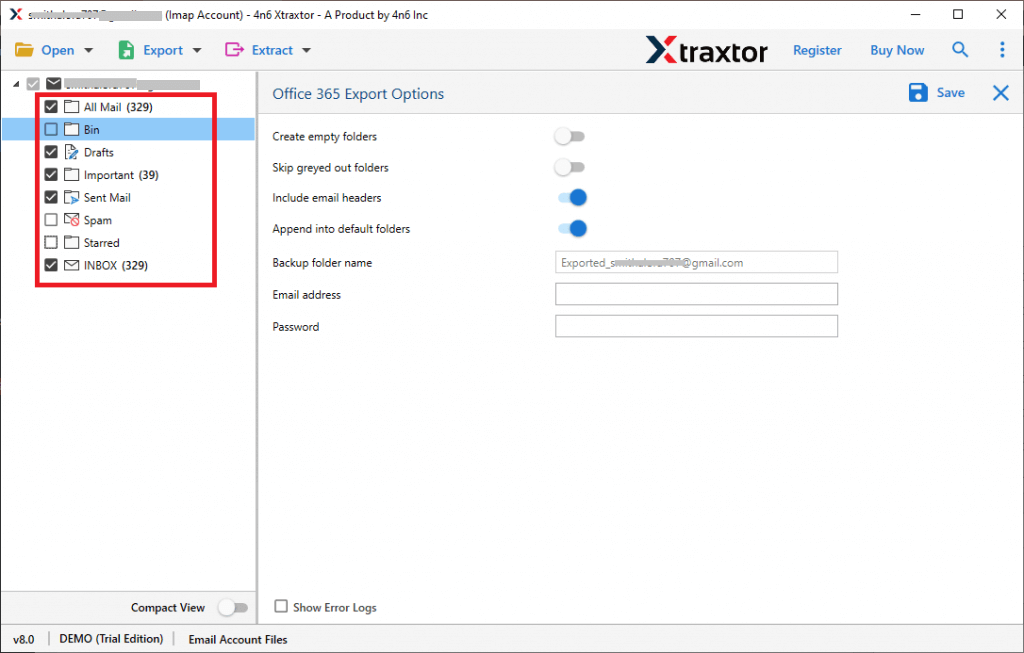
- Enter your Office 365 login details and hit on the Save button.

Done! Here you transfer Windows Live Mail to Outlook 365 account in a few simple clicks without any data loss.
Why Choose Windows Live Mail to Office 365 Migrator?
There are various prominent features of the software that helps in efficient email migration –
- Directly migrate Windows Live Mail to Office 365 account.
- Maintain email folder and sub-folder hierarchy and structure.
- Allow to export Windows Live Mail emails to different file formats.
- Different advanced email filters – to, from, cc, bcc, name, date, etc.
- Preserve email key elements and meta-data while transfer Windows Live Mail to Office 365 account.
- Works on Windows 11, 10, 7, Vista, XP and all other previous OS versions.
- Allow to select email folders before export email from Windows Live Mail to Outlook 365.
- A free demo version of the software is also available to analyse the working of the software.
Conclusion
Here in this blog, we discuss the two workable solutions to transfer Windows Live Mail to Office 365. You can either opt for a manual approach to migrate Windows Live Mail to Office 365 mailbox or an automated tool mentioned in the post. However, with a manual approach, there are certain limitations, thus we recommend trying the automated tool mentioned here.