If you want to move MBOX file into Rackspace Webmail account without any data loss, then you need the right approach. This post will provide various ways to import MBOX to Rackspace account with ease.
“Hi, I have MBOX files that I want to move to my webmail account. I use the Rackspace email service. But I don’t know how to do this import process. Can anyone tell me an instant solution to help me move MOX to Rackspace account?”
“My manager sent me some MBOX files and asked me to move them to a company mailbox. We use the Rackspace service to send emails. However, I searched the mail account for any option about this import and unfortunately, I didn’t find anyone. Is there any way to import MBOX to Rackspace account? If yes, please share.”
These are the common queries asked by many users. If you are among one of them, then this article solve your problem and provide a secure way to import MBOX file to Rackspace account.
Methods to Import MBOX Emails to Rackspace
You can move MBOX files to Rackspace account in two ways. Both ar efficient to perform this import process in their own way.
#1. Move Emails from MBOX to Rackspace Using Third-Party Solution
#2. Manually MBOX to Rackspace Import
Let’s dive in and know both approaches in detail with step-by-step description.
How to Import MBOX to Rackspace With Attachemnts?
Use MBOX Converter tool for an easy and secure import process. This tool is specially designed to move MBOX file into Rackspace and mail accounts. Using this utility you can swiftly move multiple MBOX files into Rackspace account in a single interface. With its easy-to-use interface, any novice user can perform the MBOX to Rackspace import process without any assistance.
In addition to these, this software also import MBOX to Roundcube, Gmail, Yahoo, Exchange, GoDaddy, and many webmail accounts without any data loss. There are many other features of this tool which we will discuss later.

Follow the steps to migrate MBOX file to Rackspace mailbox with attachments –.
- Download and run the SysConverter for MBOX on your system.
- Click on the Open drop-down menu and select the required fields.
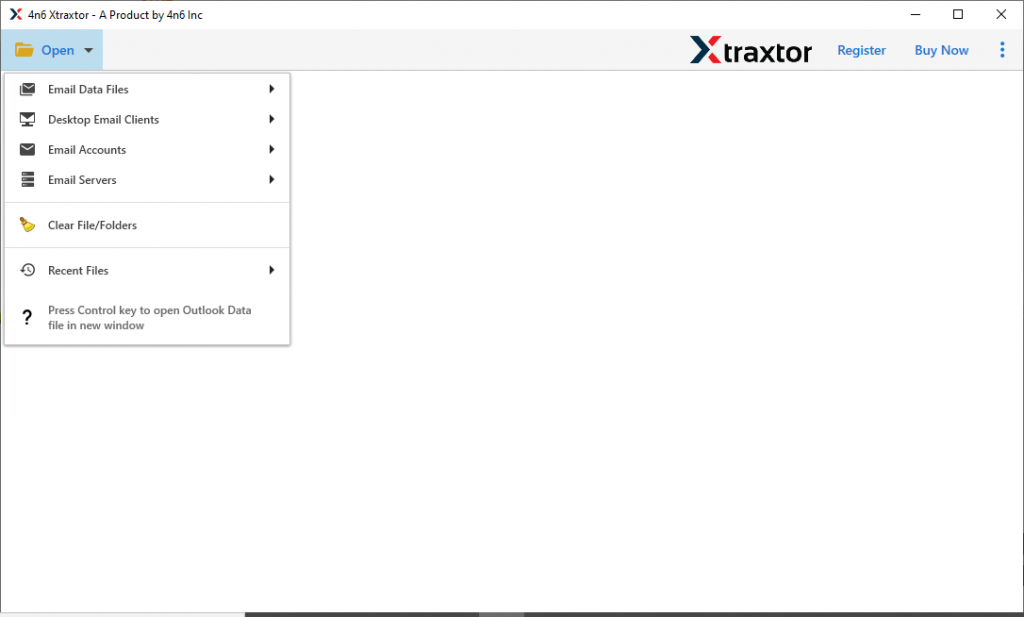
- Now select Email Data File >> MBOX File >> Select File or Folder.

- Here you will find all the MBOX file data. Read them and select the required email folders to move.

- Click on the Export and choose the IMAP option.
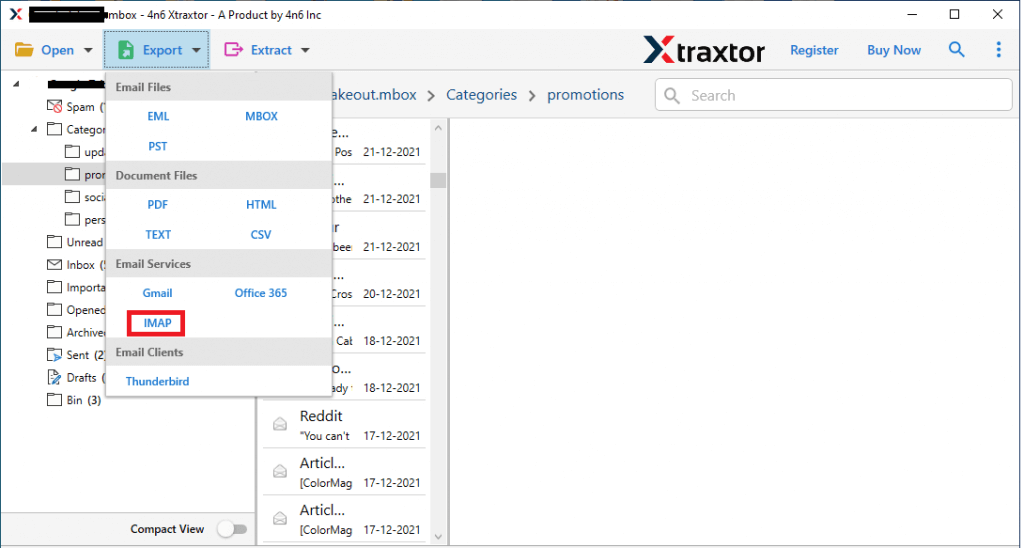
- Enter your Rackspace account details and hit on the Save button.
[Note: Email Address: example@domain.com IMAP Server: example.com (Domain Name) IMAP PORT: 993]
All Done! Here is the complete MBOX to Rackspace import process. You can use the tool and move .mbox files into a webmail account in a few simple steps.
Benefits of Using MBOX to Rackspace Import Tool
This utility has many amazing features. Some of them we will learn about here.
Email Filter Option: This software has advanced email filter options to locate the specific emails and transfer them. You can use various filter options such as – to form, cc, bcc, date range, subject, time, has attachments, content, and many more to choose from.
Maintain Mailbox Structure: The tool very efficiently move mailbox data without affecting the email formatting. This utility makes sure to preserve the email folder and subfolder structure and hierarchy during importing process.
Move MBOX to Other Webmails: Using this utility you can also import MBOX to Gmail, Yahoo, Office 365, Google Workspace, and all other cloud-based email servers.
Easy to Use Software: MBOX to Rackspace Import Tool is designed with a simple graphical interface so that any novice user operate it and import MBOX to Rackspace account with ease.
Windows-Based Utility: This utility is specially designed for Windows-based users to import emails. It will easily be installed and run on Windows 11, 10, 8, and all other previous versions.
How to Move MBOX to Rackspace Manually?
To manually import MBOX to Rackspace, you need to configure your webmail account to Thunderbird or any other email client that supports this file format. After configuration, it will be easy to move the data file to the Rackspace account. For that follow the given instruction.
- Open the Thunderbird application on your system. (If you don’t have it, then install it).
- Go to Tool >> Account Setting.

- Under the Account action select Add Email Account option.

- Enter your Rackspace email address and password, then click on Connect button.
- Now your mail account data is loaded into Thunderbird.
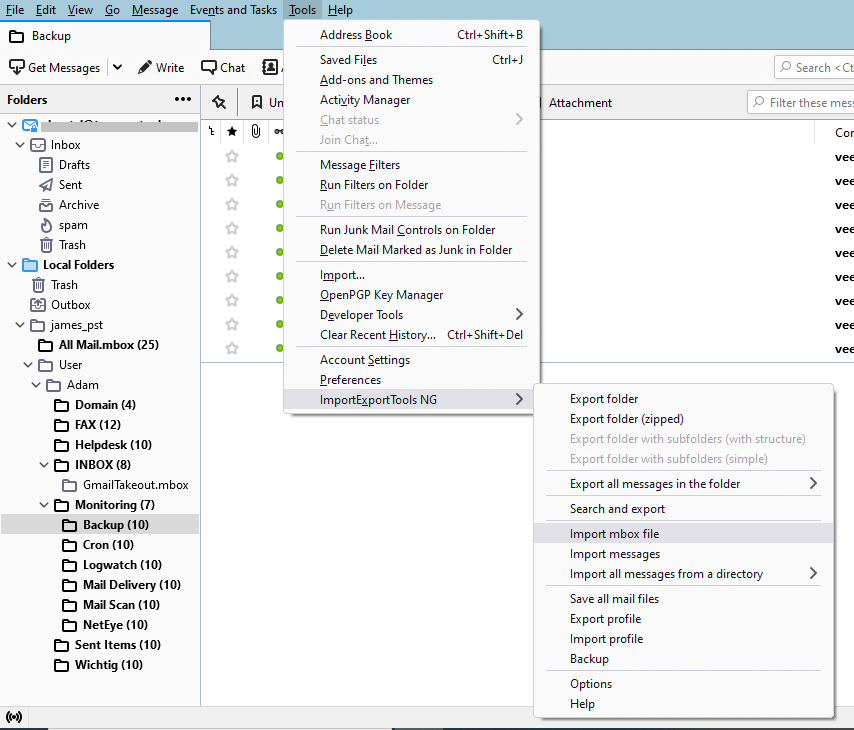
- Again clcik on Tool >> Add-ons and install ImportExportTool NG.
- After installation, restart your email client. Then click on Tool >> ImportExportTool >> Import MBOX File.
- Browse the MBOX file from your system and upload it.
- Now move the imported data file under the Rackspace id label.
Here completes the process. You can use any of the methods to import MBOX file to Rackspace account. In case you find this manual way a little bit difficult and lengthy, then you can opt for the automated tool.
Conclusion
Here we have two methods to import MBOX to Rackspace account. You can choose any of them as per your needs. However, if you want an instant and hassle-free result, then you can use the Tool. Hope these methods are able to solve your issues.