Learn the secure and efficient ways to convert OST file to PST manually. If you want to export your OST file data into a PST file for free, then this blog provides a few reliable solutions to complete the process.
OST is the offline data storage file created by Outlook. This data file contains emails, contacts, calendars, journals, events and complete mailbox data. However, user sometime prefers to export their OST file data into PST file so that it can be accessed on other systems. In this blog, we will simplify the process for you and manually export OST to PST with complete data.
Now, without further delay, let’s check out the different ways to manually perform OST to PST conversion.
How to Manually Convert OST File to PST?
Before we move further, note that these native solution works only when your Outlook email client is connected to the Exchange Server. If not, then opt for automated software. Let’s dive in and discuss secure approaches one by one and convert OST file to PST manually.
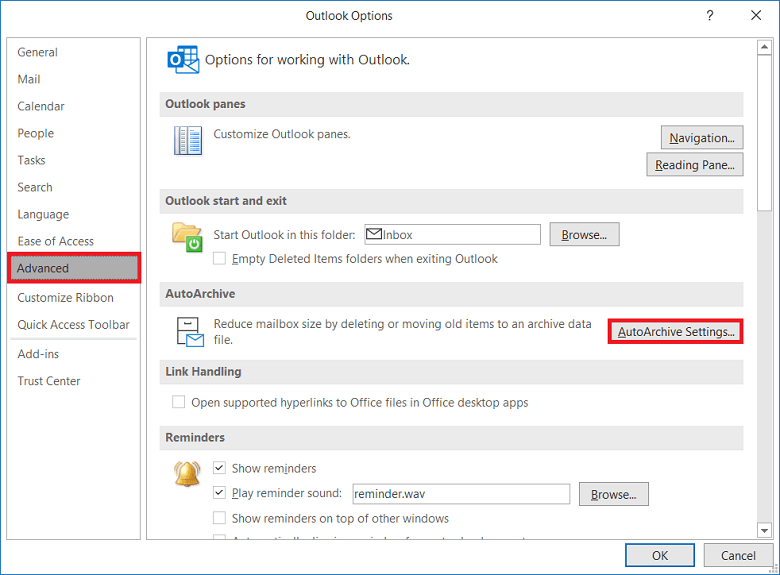
1: Transfer OST File to PST Format Using the Import/Export Tool
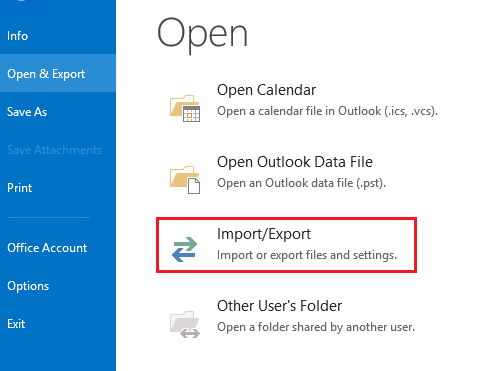
In this solution, we will use Outlook inbuilt tool that allows us to export mailbox data into .pst format. Follow the given instructions to perform this conversion process.
- Open the Outlook email client on your system.
- Clcik on the File >> Open & Export >> Import/Export.
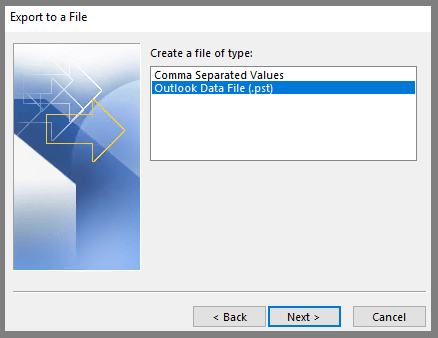
- After that select Export to a File and click on the Next button.

- Choose Outlook Data File (.pst) and then Next.
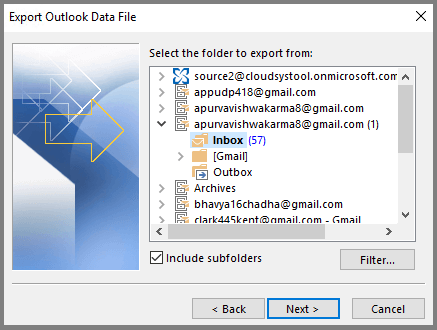
- Select the email folders that you want to export.
- In the last step, browse the saving location and then clcik on the Finish button.
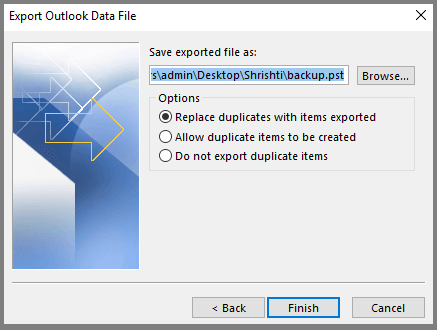
Here you export the OST file to PST in Outlook using a manual approach.
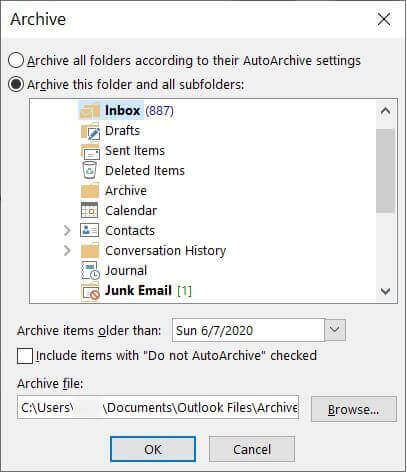
2: Convert OST to PST Manually Using Archive Feature
Outlook has an Auto Archive feature that automatically saves the OST file data into a separate PST file. In this way, you can manage the space of your mailbox by archiving old emails and making a place for new ones. Follow the given instructions to enable the archive setting.
- Run the desktop email client on your machine.
- After that go to File >> Options.
- Then click on the Advance >> AutoArchive Settings.
- Now select the days to run the auto-archive process. Then select the folder that you want to export and provide a location to save old emails. At last click on the OK button.
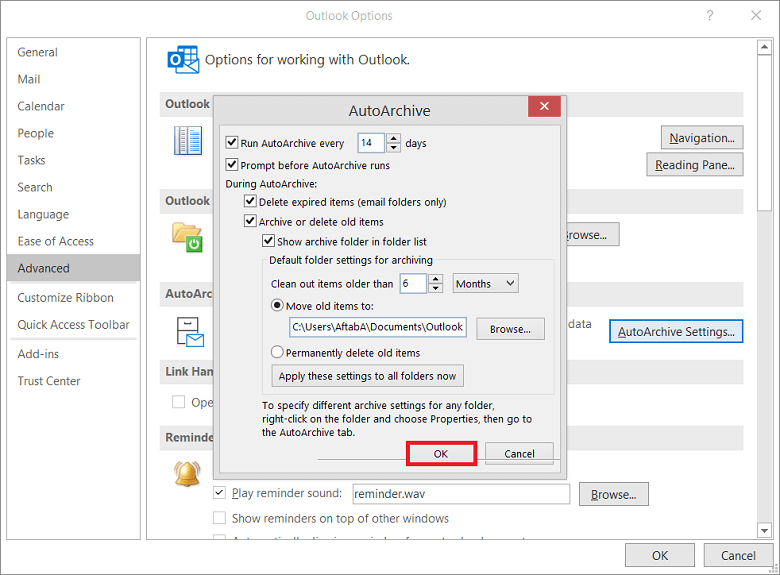
After that, your Exchange Server emails will be exported into a PST file.
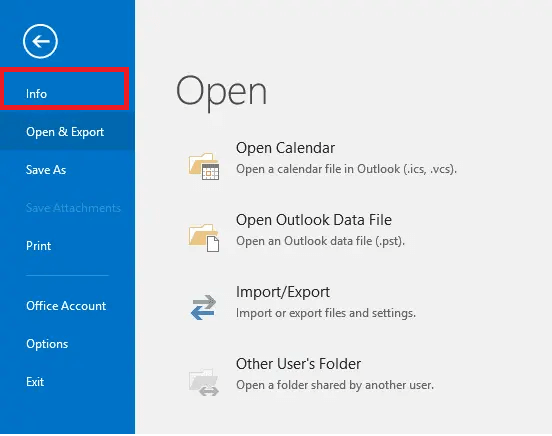
3: Export OST File to PST Manually
If you don’t want to regularly backup Outlook OST to PST, then you can manually archive the emails. To perform this task follow the given instructions.
- Launch Outlook on your Windows OS.
- Go to File >> Info.
- Then select Cleanup Tool >> Archive.
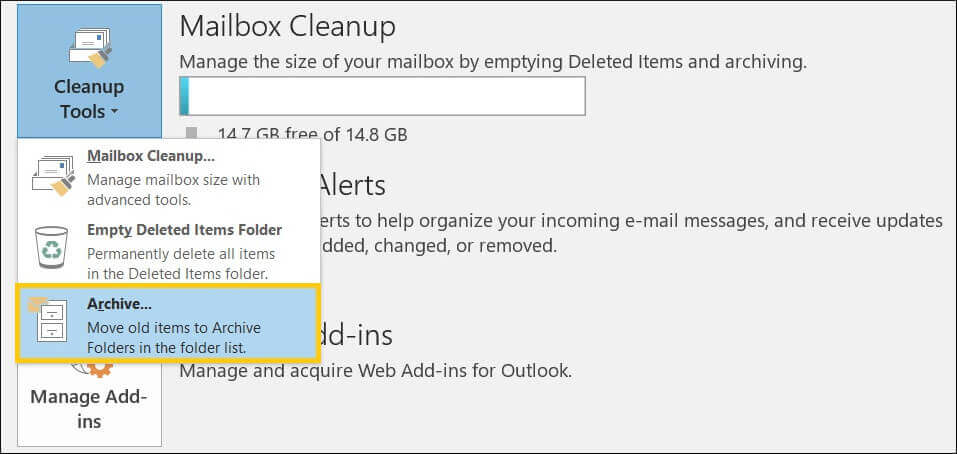
- Here select the folders that you want to export. Along with it, you can choose the date range and also browse the location to save the archive file. At last clcik on the OK button.
4: Export OST to PST Using drag-and-drop
To convert OST file to PST manually you can also use the drag-and-drop technique. It is an easy way to move emails from the .ost file into .pst. Simple steps to perform this task,
- Open Outlook and then click on Home >> New Items >> More Items >> Outlook Data File.
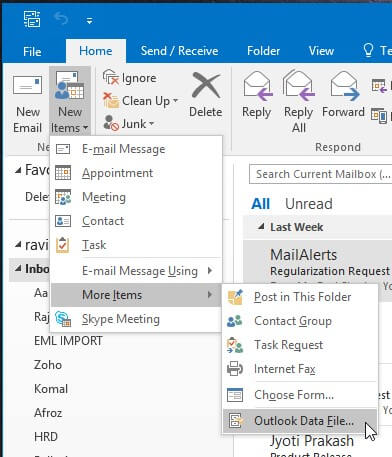
- Enter the name of the PST file and clcik on the OK button.
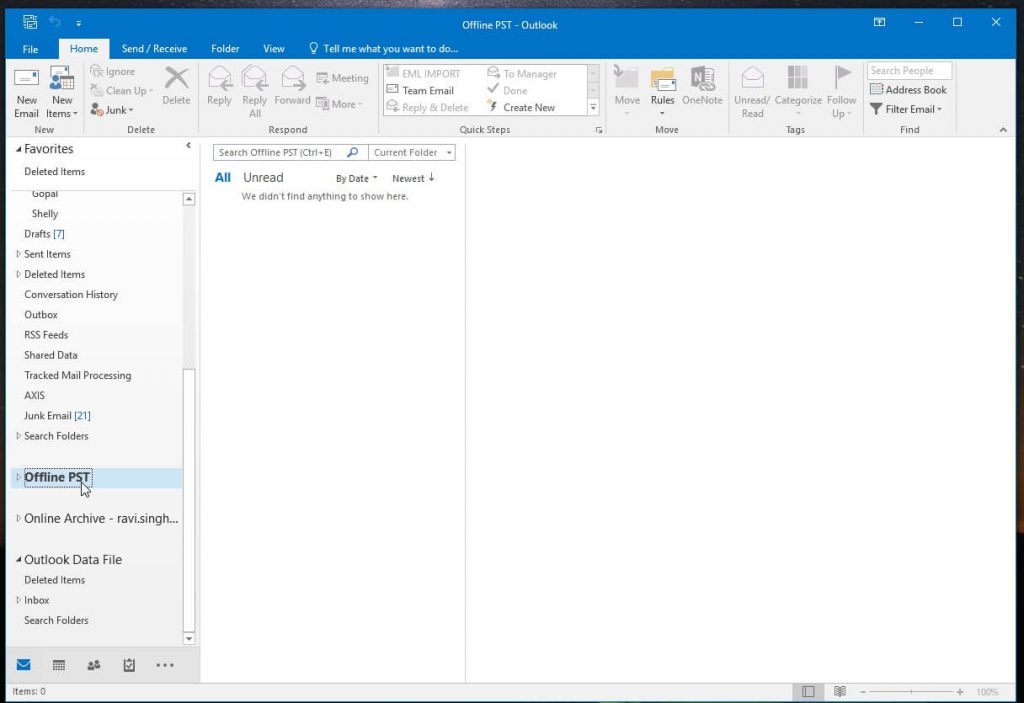
- This adds a new blank PST file. Now you can drag the email folder that you want to export and drop them into this newly created file.
Follow the steps for each folder or message you want to export.
Note: We recommend using secure and reliable third-party software if you want to convert OST to PST without Outlook automatically.
Conclusion
In this write up we describe 4 different methods to convert OST File to PST Manually. You can try all these manual methods and find a suitable approach that fulfils your requirements. Hope this article will be helpful to you and able to solve our conversion problems.