Summary: This article is all about the importing process of PST to Rackspace webmail account. If you are also looking for an instant approach to import PST to Rackspace email account, then read the article to the end. At the end of the article, you are able to transfer PST emails to Rackspace webmail account without any data loss or modification.
There are various users that are switching from Outlook to Rackspace account. Along with that, they are also looking for a way to move Outlook emails to the Rackspace account. However, there is no direct manual way to import PST to Rackspace account.
Now the question is – How to import PST emails to Rackspace account? Answer to your question in SysConverter for PST.
Before we discuss the working of the PST to Rackspace import process, let’s get to know about the webmail.
Rackspace is a webmail service that integrates with your web hosting. If you host your website on the cloud, then you also get a business email account. Rackspace is one such email account that is used globally. It is a US-based cloud computing company that provides a plethora of services around the world, including web hosting.
How to Import PST File to Rackspace Webmail?
Use PST Converter software and transfer all emails and other mailbox components to Rackspace account. It is a secure approach to move Outlook emails to Rackspace without any data loss. This tool comes with advanced filter options that help you locate specific emails and import them into your webmail account.
Download the demo version of the software, for that, click the below link.

Steps to Import PST to Rackspace –
- Install and Run SysConverter for PST on your system.
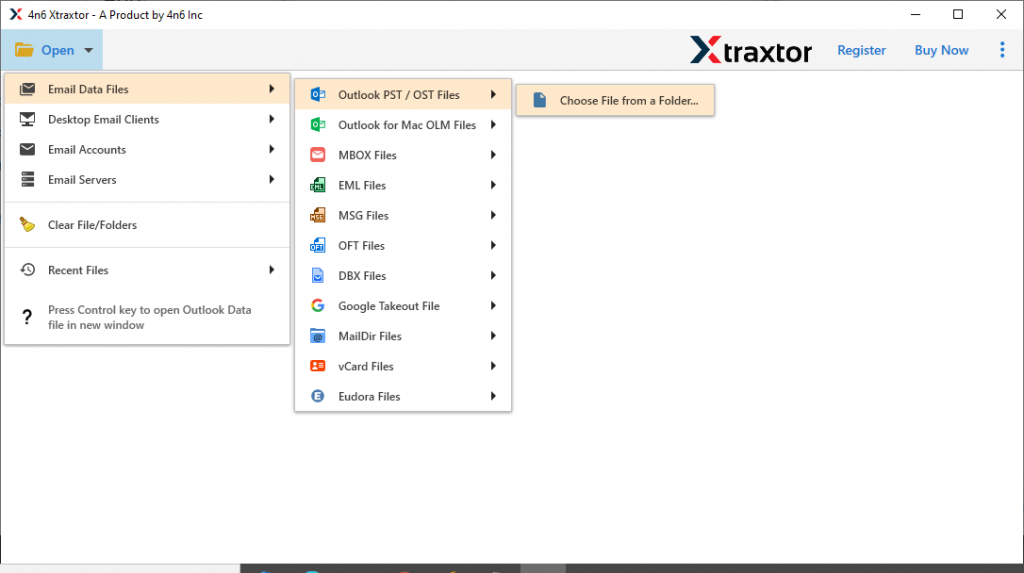
- After that, select Open >> Email Data File >> PST File >> Select File from Folder.
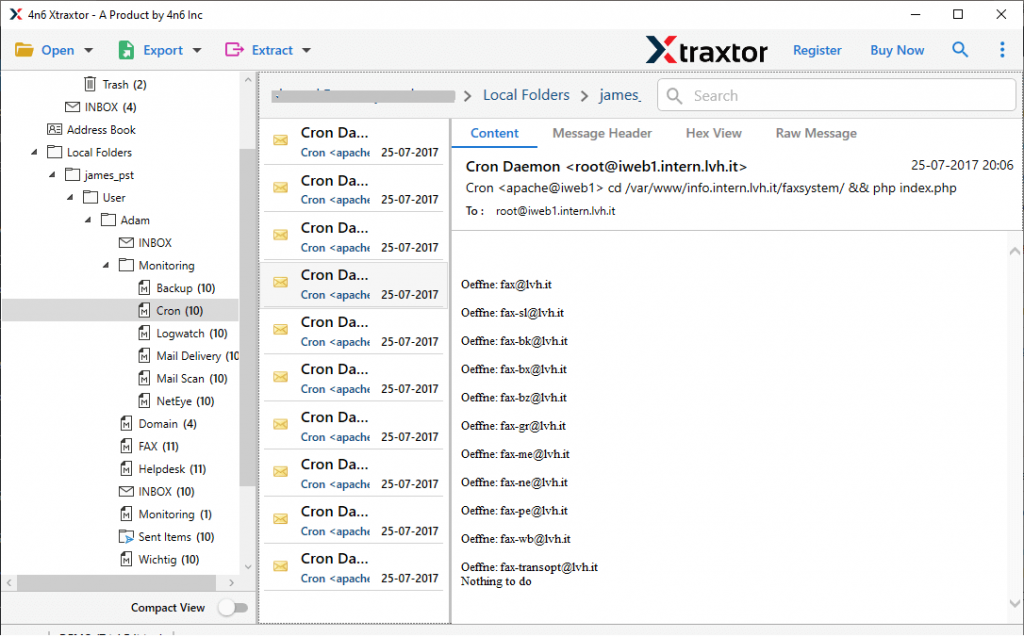
- Here all your mailbox data will be shown. Read them and find which emails are important and need to be imported.
- Click on Export and choose IMAP as a saving option.

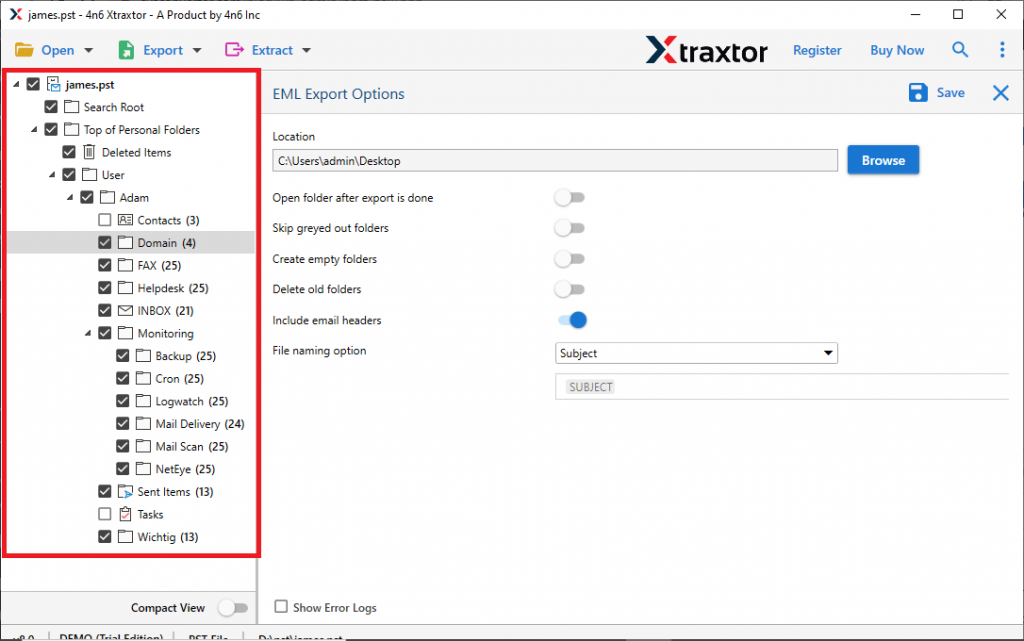
- Now select the email folder you want to transfer ( If want to import complete mailbox data, then select all).
- At last, enter Rackspace email address and password, then hit on the Save button.

Finish! Here you import PST to Rackspace account in a few simple steps.
Why Use PST to Rackspace Import Tool?
With this software, you will get many advanced features to perform the importing process securely and efficiently. Some of them mention here,
- Email Filter Option: With this utility, you can choose from various filter options and import only the emails you need. You can apply many filters such as – To, From, Subject, Bcc, Cc, Has Attachments, Date Range, Time, Content, Name, Property ID, and more.
- Maintain Mailbox Hierarchy: This tool preserves the email folder and subfolder structure when importing emails from PST files. All Outlook emails will appear in the original folder in Rackspace.
- Support Windows OS: The PST to Rackspace Import Tool is designed for Windows-based users. It will easily install and operate on Windows 11, 10, 8, XP, Vista and all other previous versions without facing any technical difficulties.
- Move PST to Other Webmail Accounts: This advanced tool not only transfers PST file to Rackspace but to other email accounts.
- Multiple Saving Options: With this import tool, there are various other options to save PST file data. Using this tool, you can convert emails from PST to MBOX, PDF, CSV, HTML, and all other formats.
Conclusion
Importing email from one source to another isn’t easy, but it’s not that hard either. With the right technology, you can import PST to Rackspace and other webmail accounts. In this post, we discussed the solution to swiftly import PST emails to Rackspace account without any data loss. You can also try the import process using the demo version of this software.